Dig faster...
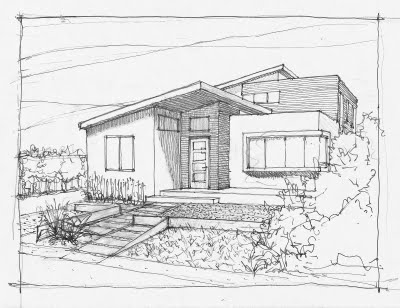
Ana & Libby have entered our project in an AIA architecture competition. I wish I could tell you more about it, but that's all I know. They put together a visual "brief" for the submission, including this very nifty hand-drawn sketch by Ana:
Here's a link to the actual AIA document with lots of swell before-n-after shots.
AWA also put together a flyer for the Build-it-Green tour:
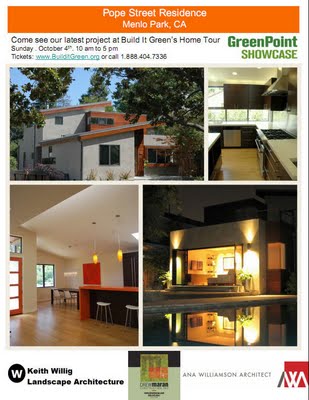
Click the pic above to see the whole thing (3-pages, PDF).
You can see that while the actual house is a nice match for the picture, the front landscaping isn't quite...there yet. It does illustrate where we are headed though; there will be a series of low Cor-Ten "weathering steel" walls - a combination of rectangles and "wedges". We'll then berm soil against the walls and plant "growies" (a highly technical landcaping term we've learned).
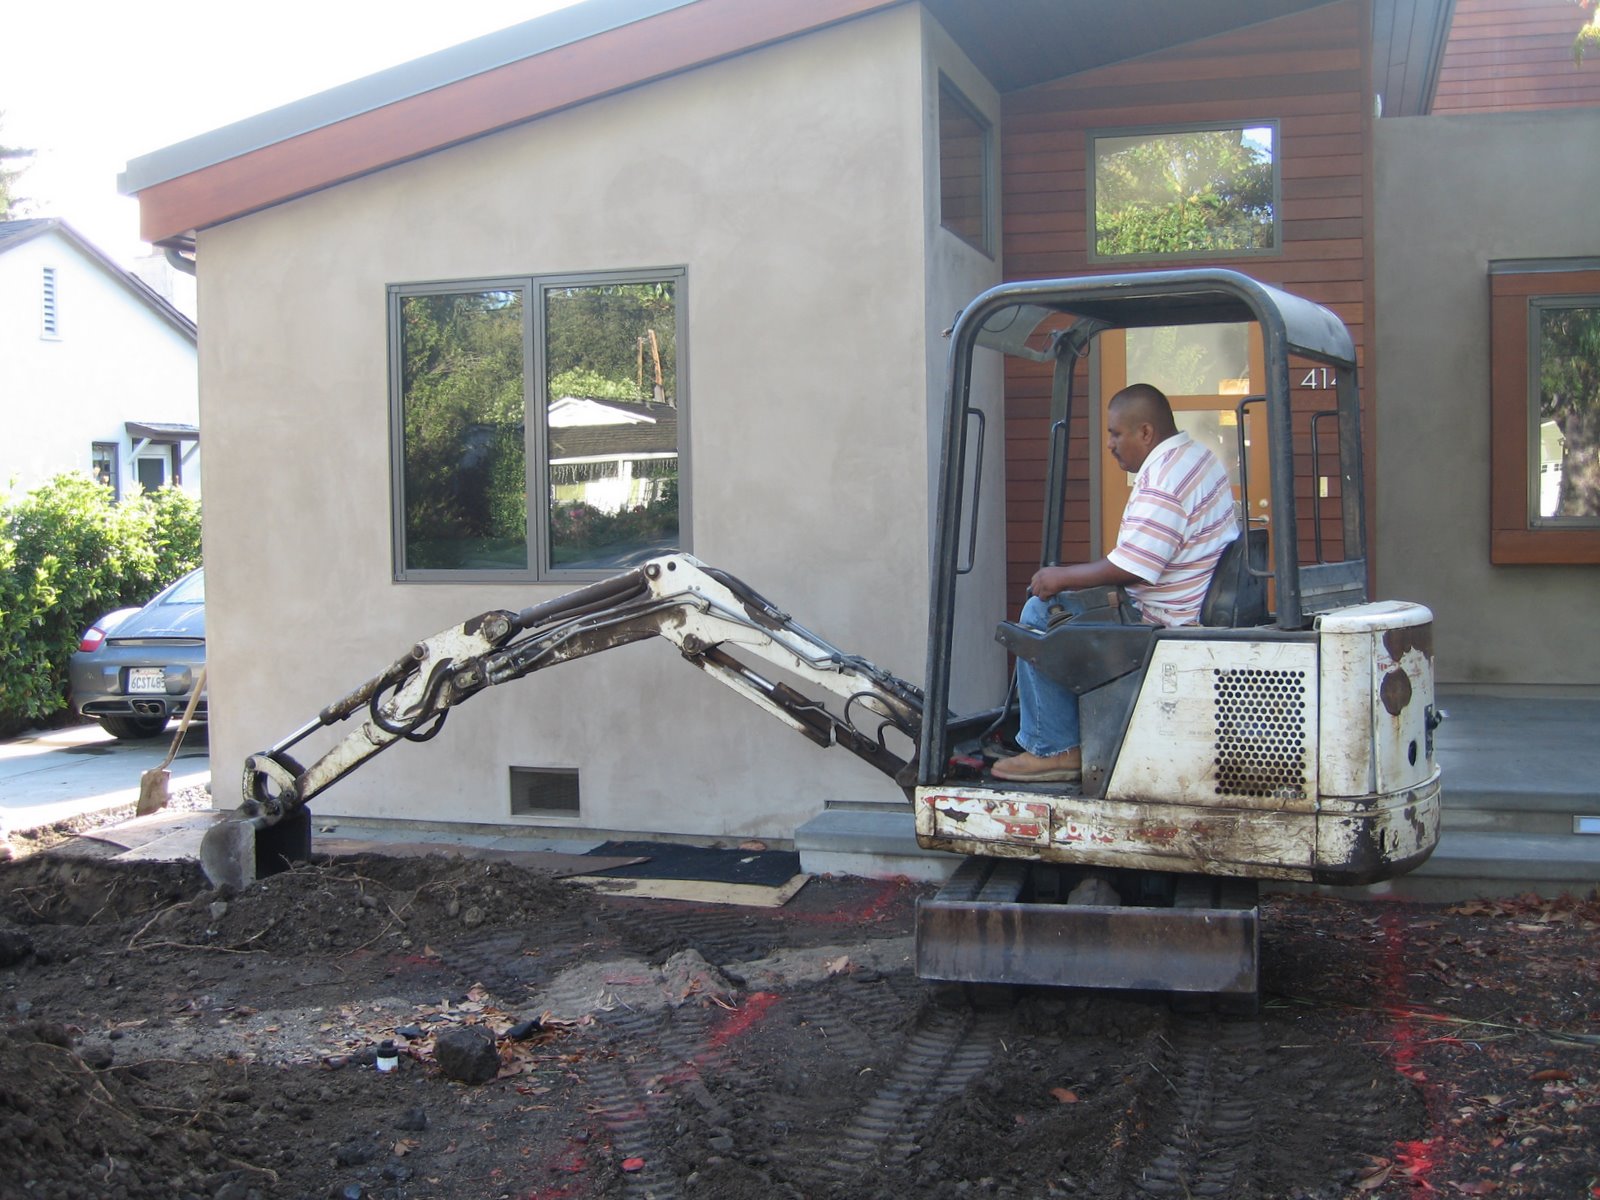
So, to that end, Keith is scrambling to get the landscaping underway - and finished by the October 4th Build-it-Green tour. It's, um, going to be interesting, considering this is where we are at:
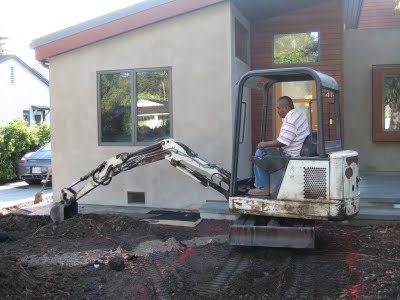
I came home after work today to find the Bobcat excavator perched on top of the dirt pile. Interesting place to park.

Here's the big trench from which all the dirt came...

So hopefully we'll see the formwork for the concrete footings (to support the Cor-Ten) and stepping stones (maybe?) go in this week.
My weekends are still spent on my hands and knees building the Ipe landings and decks. Here are a couple of in-process shots of the side landing (the one that opens up):
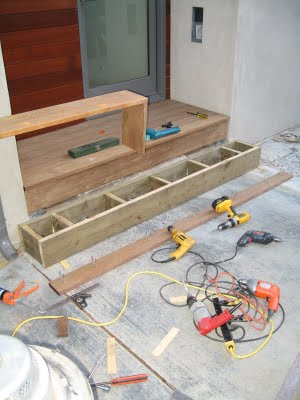
I should also mention that this shows that you can never own too many drills (I think I've had as many as 7 out at once...all being used.)
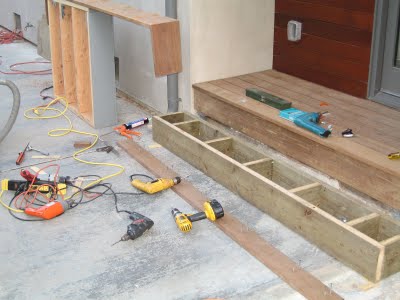
Here's the front riser board going in:
All the surfacing is Ipe (Ironwood), which is just a blast to work with - it might as well be Aluminum. It's about as heavy, and is so hard it can't actually be nailed. Every hole has to be drilled first. It also gives you the nastiest splinters ever - they are like steel needles - that hang around hurting for days.
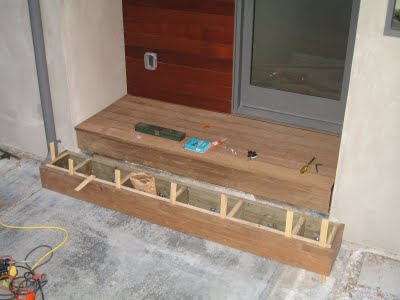
The side landing is almost done now, it only needs the screw holes plugged with Ipe plugs, then sanded. I got Cathy to help with the fussy work of gluing in the plugs so I can come back later to cut them off and finish it.
While she was doing that, I moved on to the master bedroom balcony deck. I really want to get this one finished before the tour since I don't think having 500 people tromping all over the membrane roof would be a good idea.
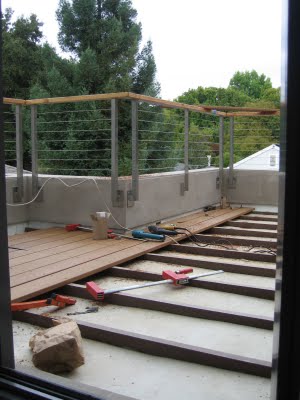
This one is also a real trick. The deck has to sit VERY low to the roof as there isn't much of a step when you walk out of the bedroom door (2 inches). Just to complicate things even further, the membrane roof is sloped in every direction, with various valley's, lumps, seams, etc. I had to custom make 11 "sleepers" onto which I'll screw the deck boards - each one had to be contoured to fit the roof, yet have a perfectly straight top edge - that all have to line up perfectly to create the actual deck surface.
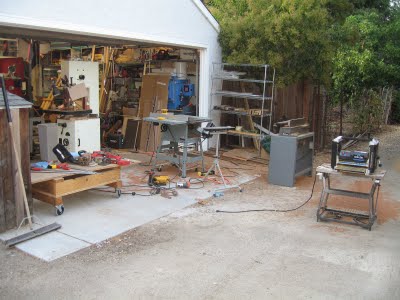
It's a good thing I've got a garage full of gear...I really don't know how you'd do this otherwise. Today's quiz is to find the jointer, planer, tablesaw, biscuit joiner, belt sander, palm sander, trim router, and metal bandsaw in the pic below. Extra credit if you can identify the second, wood-only, bandsaw. (And yes, I know my garage is an absolute disaster...I'll clean it up once all these projects are behind us...)
And here's the deck in process:

And this is as far as I got on Sunday...note the raindrops that cut my day short:

 Stay tuned to see how this all turns out...

Here's a link to the actual AIA document with lots of swell before-n-after shots.
AWA also put together a flyer for the Build-it-Green tour:
Click the pic above to see the whole thing (3-pages, PDF).
You can see that while the actual house is a nice match for the picture, the front landscaping isn't quite...there yet. It does illustrate where we are headed though; there will be a series of low Cor-Ten "weathering steel" walls - a combination of rectangles and "wedges". We'll then berm soil against the walls and plant "growies" (a highly technical landcaping term we've learned).
So, to that end, Keith is scrambling to get the landscaping underway - and finished by the October 4th Build-it-Green tour. It's, um, going to be interesting, considering this is where we are at:
I came home after work today to find the Bobcat excavator perched on top of the dirt pile. Interesting place to park.

Here's the big trench from which all the dirt came...

So hopefully we'll see the formwork for the concrete footings (to support the Cor-Ten) and stepping stones (maybe?) go in this week.
My weekends are still spent on my hands and knees building the Ipe landings and decks. Here are a couple of in-process shots of the side landing (the one that opens up):

I should also mention that this shows that you can never own too many drills (I think I've had as many as 7 out at once...all being used.)

Here's the front riser board going in:

All the surfacing is Ipe (Ironwood), which is just a blast to work with - it might as well be Aluminum. It's about as heavy, and is so hard it can't actually be nailed. Every hole has to be drilled first. It also gives you the nastiest splinters ever - they are like steel needles - that hang around hurting for days.
The side landing is almost done now, it only needs the screw holes plugged with Ipe plugs, then sanded. I got Cathy to help with the fussy work of gluing in the plugs so I can come back later to cut them off and finish it.
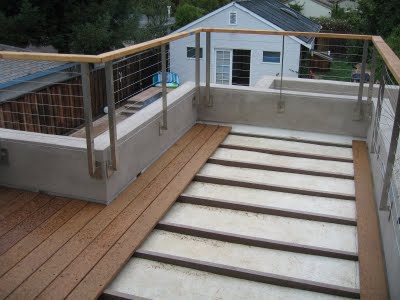
While she was doing that, I moved on to the master bedroom balcony deck. I really want to get this one finished before the tour since I don't think having 500 people tromping all over the membrane roof would be a good idea.

This one is also a real trick. The deck has to sit VERY low to the roof as there isn't much of a step when you walk out of the bedroom door (2 inches). Just to complicate things even further, the membrane roof is sloped in every direction, with various valley's, lumps, seams, etc. I had to custom make 11 "sleepers" onto which I'll screw the deck boards - each one had to be contoured to fit the roof, yet have a perfectly straight top edge - that all have to line up perfectly to create the actual deck surface.
It's a good thing I've got a garage full of gear...I really don't know how you'd do this otherwise. Today's quiz is to find the jointer, planer, tablesaw, biscuit joiner, belt sander, palm sander, trim router, and metal bandsaw in the pic below. Extra credit if you can identify the second, wood-only, bandsaw. (And yes, I know my garage is an absolute disaster...I'll clean it up once all these projects are behind us...)

And here's the deck in process:

And this is as far as I got on Sunday...note the raindrops that cut my day short:

 Stay tuned to see how this all turns out...
posted by contraption at
10:04 PM
![]()
0 Comments:
Post a Comment
<< Home